
Last updated:
Think of this as three layers:
- Your identity & business details (KYC / AML)
- People of the company (legal representative, beneficial owners)
- Payment setup (accept cards + payout bank)
Where to start
From the dashboard header, open the verification badge, or follow the onboarding modal when prompted.
Typical wizard steps:
- Personal details
- Compliance (address, source of funds / occupation as asked)
- Business / activity
- Company — incorporation, registered office, legal representative, UBOs
- Freelancer — activity address and legal name (verified as an individual; no UBO list)
- Payment setup (company vs freelancer matches signup)
- Choose plan
Signup asks Company or Freelancer first so BaxPay collects the right verification details for your entity type.
People (legal representative & UBOs)
Why this matters
For companies, European rules require identifying:
- The legal representative (who can act for the company)
- Ultimate Beneficial Owners (UBOs) — people who own/control a significant share (often ≥ 25%)
Freelancers / sole proprietors are verified as the individual merchant; People is optional and mainly useful if you add collaborators later.
How to add people
- Go to Settings → Workspace → People (or
/people). - Click Add person.
- Choose role: Legal representative or Beneficial owner.
- Enter full name, date of birth, nationality, ownership % when relevant.
- Save.
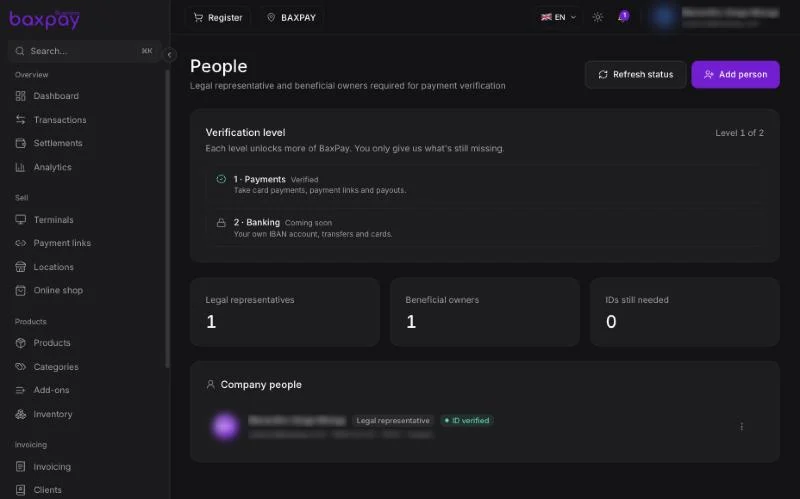
Identity documents
When asked:
- Open the person.
- Upload an identity document (passport / national ID) as instructed.
- Wait for review / automatic checks.
Tips
- Use clear, full-page photos (no cropped corners).
- Names must match official documents.
- Keep UBO ownership percentages consistent with your company register.
Payment setup (accept cards)
- In the wizard, open Payment setup.
- Follow the BaxPay screens (business type, bank for payouts, extra docs if requested).
- When status is ready / active, payment links and card Register sales can go live.
If a feature is blocked with “complete payment setup”, finish this step first.
Linked bank account (payouts)
Add the IBAN where settlements should land:
- Open Linked accounts (Money section, when enabled), or complete the bank step in the wizard.
- Add a bank account with correct IBAN / holder name.
- Confirm it matches the verified business when required.
BaxPay stores your onboarding profile and payout IBAN in our systems so you are not asked twice when more services are enabled later.
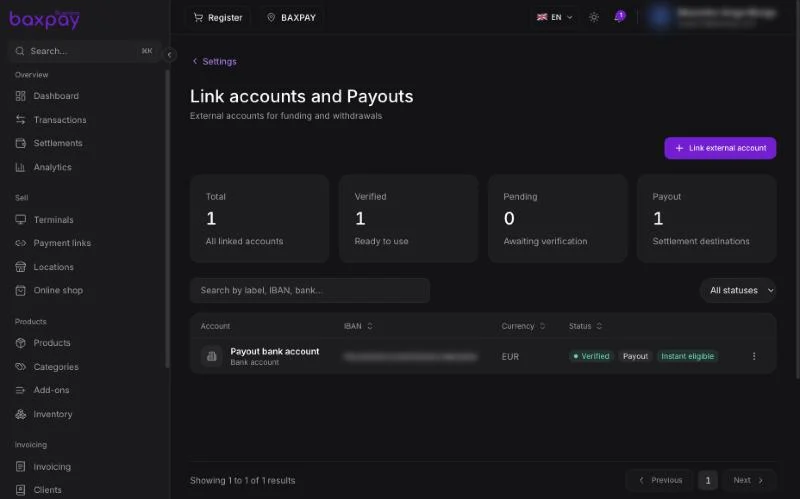
Checklist — ready to charge
- Email verified
- Personal + business KYC submitted
- Legal representative (and UBOs if any) added
- IDs uploaded if requested
- Payment setup completed
- Payout bank linked
- Plan chosen (next guide)
Troubleshooting
| Problem | What to try |
|---|---|
| Stuck on “action required” | Open People / wizard and complete missing fields or docs |
| Can’t create payment links | Finish payment setup + choose a plan |
| Wrong company data | Edit Business profile in Settings; contact support if locked after review |
Next: Plans & pricing →